Monday, 15 June 2026

A Premature Ending ... eventually

Well, it's been well over a year since I began the big reassembly in a fit of enthusiasm but, sadly, it didn't last very long.

14 months later, little has changed and I have very little enthusiasm for completing the rebuild. I've realised that this restoration was my escape from an unhappy period in my life. As soon as I got away from that unhappy place, I had no enthusiasm for carrying it on really.

So, she has been advertised on EBay and sold to someone in the South East. There's not really very much left to finish and I hope he will get joy from it.

Meanwhile, I am going to get joy from riding my remaining bike on high days and holidays. Note, singular, as the Crusader 250 is also currently up for sale as part of simplifying my life and getting rid of "stuff". I concluded that any motorbike more than 1 should count as "stuff"!


Sunday, 2 March 2025

Big reassembly!

I've reached the end of one of the big parts of the house refurbishment and need to clear the back bedroom, where most of the bike parts are stored, before I can decorate that, so I decided to have a change for a couple of days and get as much of the bike rebuilt as I could.

First on were the carburettors. So nice having such good access after years of working on in-line fours and twins, where the carbs are buried in the frame.


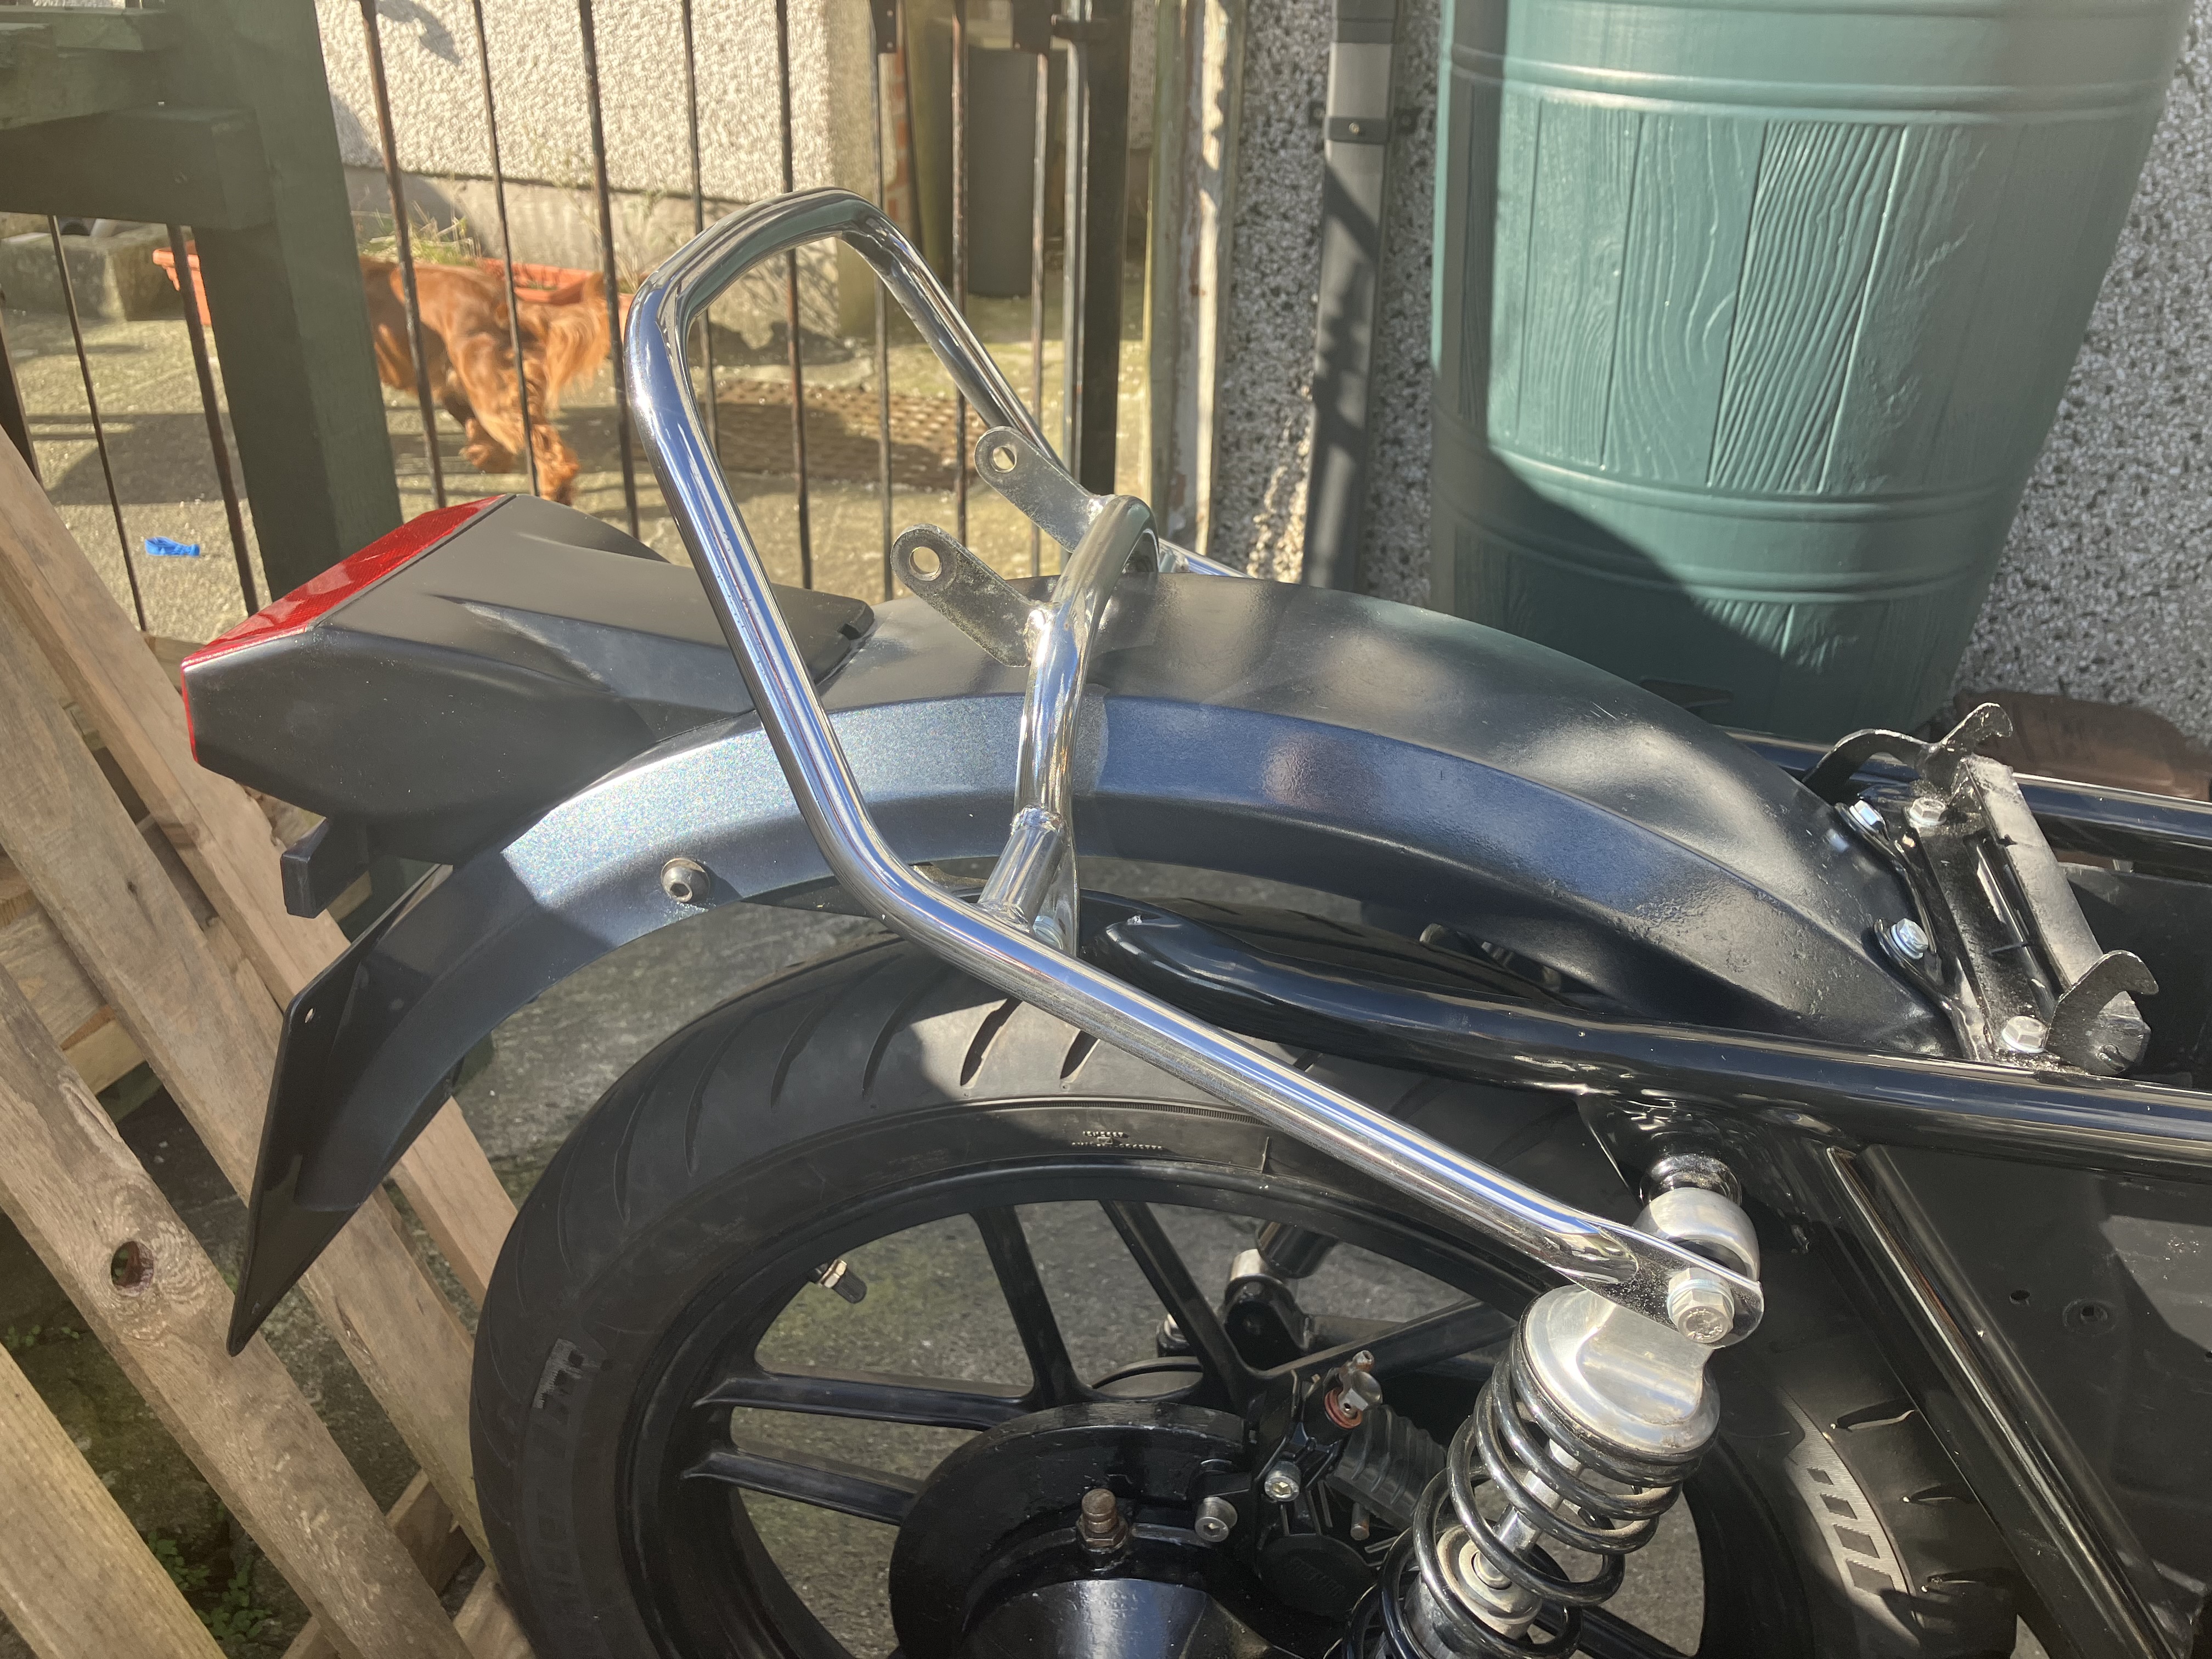
Next up was sorting out the bushes in the shocks, so they aren't wobbling around on the frame stubs and then I attached the grab rail / seat support; frame extensions and mudguard. I was so pleased that all of this lined up perfectly, after all of the reconstructive welding surgery.


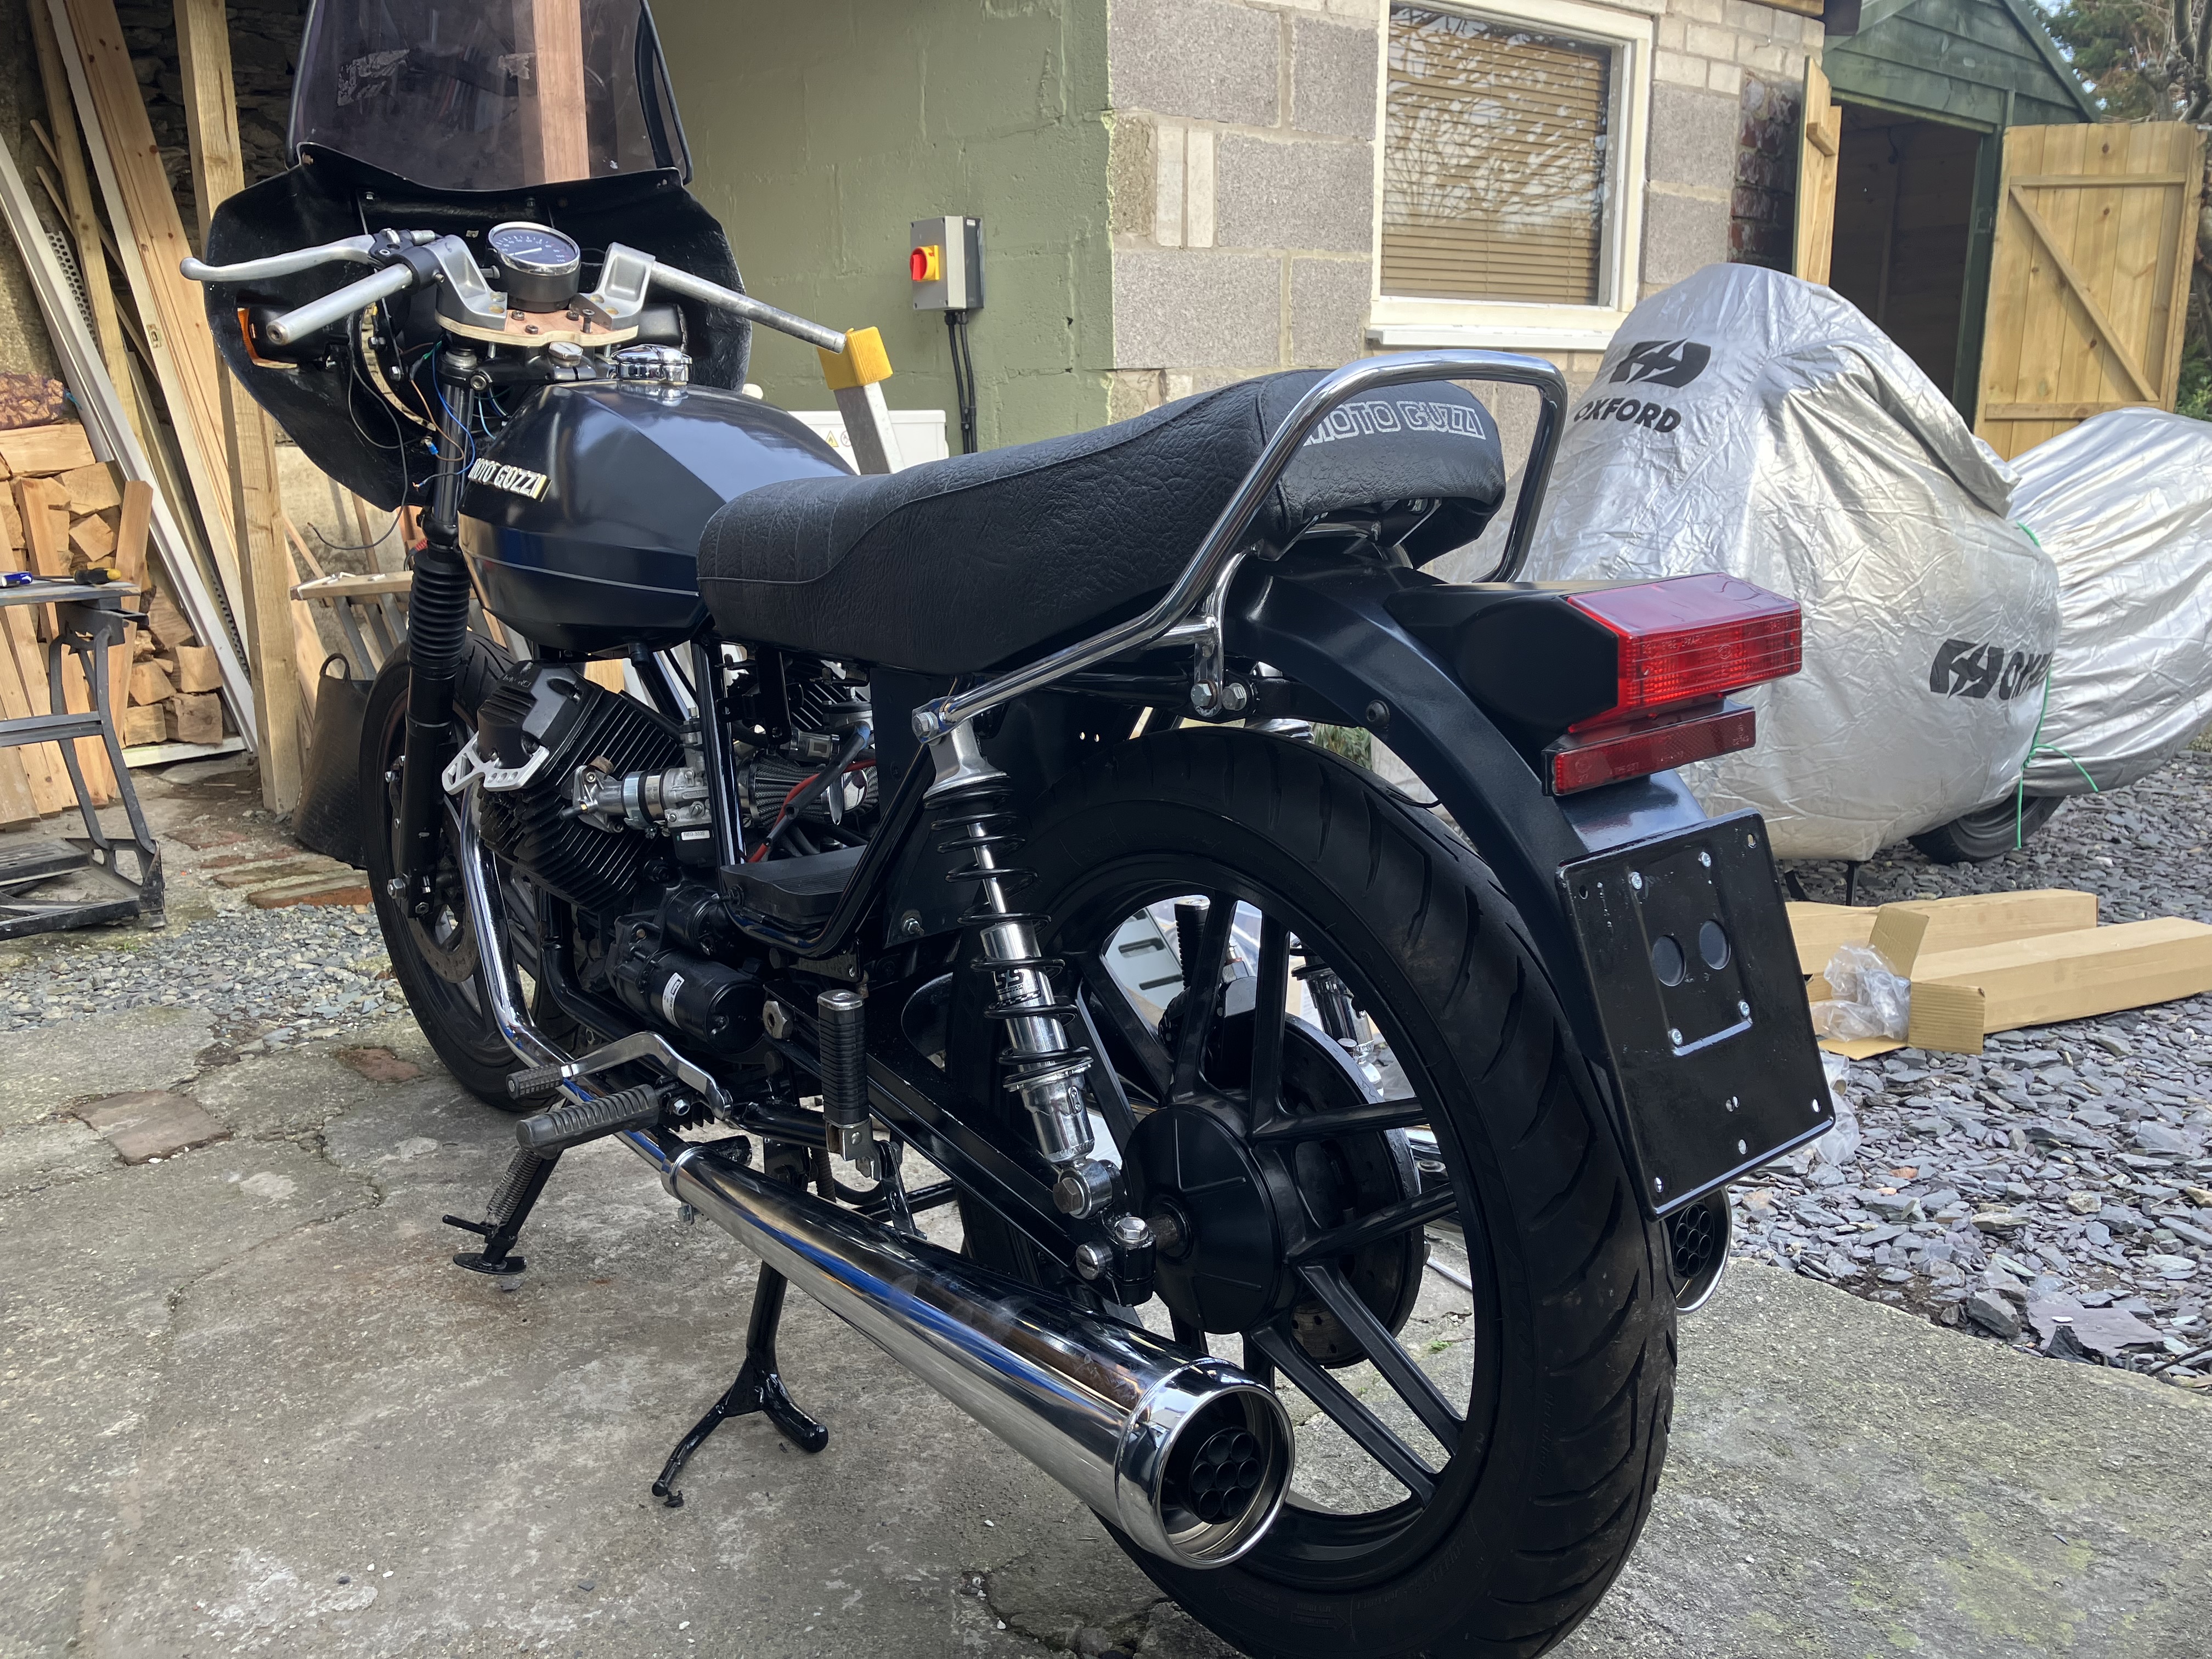
Finally, I could fit the exhausts - they always bring a bike to life. I found that the crossover pipe I'd ordered (the same length as the battered piece of rubbish that came with the bike) was about 50mm too short to really fit properly, so I've ordered a new one to the right size.

I think she's looking really well with most of the main components fitted. The major work left to do now is to make the permanent handlebar mount from aluminium; plumb up the brakes, reinstating the linked rear/front brake arrangement; and then rewire, using the fancy digital fandango that came with the bike. Plus a myriad of bits and pieces no doubt.


Friday, 24 January 2025

Brakes

During the afternoon, the storm abated a bit so I ventured out into the shed. I got all the front forks and wheel finished and bolted up tight, then trimmed and refitted a couple of the frame mounting bolts that were slightly too long.

Then I fitted the reconditioned brake calipers to each side of the forks and to the swinging arm. After hunting out new bolts for the calipers, I found the original allen keys already screwed in to their lugs on the frame! (One of the perils of having a big break in the restoration process!)


I just need to fit a refurb kit to the real wheel cylinder now and that can be installed as well.
I also inflated the tyres so that it sat properly on the centre stand and side stand.
 

Rear mudguard

I painted a coat of blue Hammerite onto the underside of the fuel tank and rear mudguard, to give a bit of extra corrosion resistance. (The rest of the bodywork is plastic or fibreglass.)

Once that had dried, I fitted the rear light and numberplate holder. It doesn't come across very well in the photographs, but I really like this whole contrast between the black parts and the blue graphite paintwork.


Recovering seat

Storm Eowyn came today so, discretion being the better part of valour, I worked on bits in the house rather than venturing out into the shed in a gale.

The seat has been sat waiting to be recovered for ages so that was first out of the box. I got the room nice and warm and wrapped the new cover around a hot water bottle to get it nice and soft and stretchy.


Ages ago, I glued some thin foam to the outside and front of the seat foam to cover some damaged bits of the original.


First things first I glued the front of the cover to the base, using UniBond contact adhesive. This meant that I could refit the rubber seat buffers on top of the vinyl, but still get access to the underside to pull the rubber lugs through that hold them in place.


Then I pulled the cover tight and used these little spring clamps to temporarily hold things in place and check alignment etc, before glueing up the back end.


After that it was a case of systematically doing about a 4 - 5" strip on each side, while the rest was still clamped up, until it was all glued. There is one small crease at the point where two "glue zones" met. It's hardly noticeable but I'm hoping that will ease out with use. Otherwise I'm really pleased with the end result.


Thursday, 23 January 2025

Back on 2 Wheels Again

With the engine, transmission and cradle complete, I moved on to preparing the top part of the frame. I ran a thread renovator through all of the threads to clean them up and remove any stray powdercoating and cleaned up the top suspension unit mounts.

I then reinstalled the steering head bearing cups and the top and bottom fork clamps.


While I had good access, I fitted the battery tray and the lower part of the rear mudguard, which also forms a little tool store.


Moving down to the shed, it was time to unite the top and bottom parts of the frame.


And in quick succession, I reinstalled the fork legs and the front wheel. I temporarily installed one of the rear shocks to hold the back end up (I'm waiting for some new bushes to arrive so I can mount them properly) and I could then get her back on her own two wheels again for the first time in several years.


I've temporarily fitted some handlebars so I can move the bike around more easily, but these won't be the ones I use permanently. I can't find any standard type handlebars that are narrow enough to fit down the side of my house and still give me enough "real estate" to mount all of the required levers and controls. So I've had to be quite inventive in how I set the handlebars up. Watch this space! 

She's looking very black and stealthy - I'm looking forward to getting the carbs, exhausts, crash bars and grab rail fitted to give a bit of bling!
 

Sunday, 19 January 2025

Drivetrain

Hot on the heels of finishing the bodywork, I now need something to hang it all on! 

First I built up the engine cradle rails; cleaning out all the threads and holes after the powder coating. This is a great system - the rails carry the centre stand, side stand, footrests, gear lever and brake pedal.


I decided that the engine was too heavy to lug up and down stairs into the temporary assembly workshop (bedroom!) so now moved out into the shed to start the main assembly. First I propped the engine on some blocks and secured a rope around the tail of the gearbox, suspended from the roof to steady it.


The cradle was then bolted up to the engine and I could use the centre stand to provide a bit more stability.


Then the shaft drive/swinging arm attaches to the back of the gearbox, using 2 pivot pins and locknuts to secure everything in place. Gratifyingly, turning the hub with the spark plugs out meant that the engine still turned ðŸ˜€


Now for the hard bit! Fitting the wheel is actually pretty straightforward, but was really awkward to organise the cush drive rubbers so that everything slotted together nicely. I needed an extra hand basically! We got there eventually though. Starting to look a bit like a powered unicycle now 😀.